
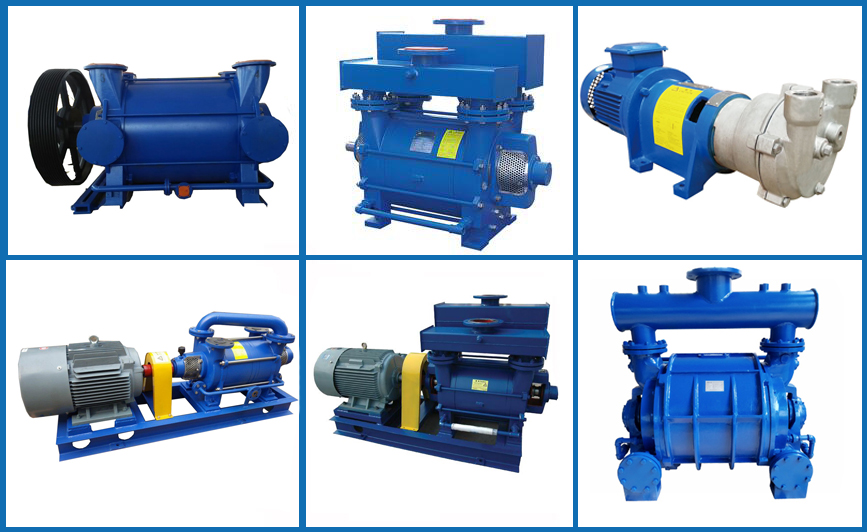
Thailand Liquid ring vacuum pump supplier
Liquid ring vacuum pump is one of the most commonly used vacuum pumps in many enterprises. Because of its simple manufacture, low price, wide range of pumping speed, isothermal compression and other advantages, it has been widely used in the case of low efficiency.
Correct installation of the liquid ring vacuum pump can not only improve work efficiency, but also reduce the failure rate in use. Therefore, the installation of the liquid ring vacuum pump is directly related to whether it can work properly. So the following is how to install the liquid ring vacuum pump correctly shared by the Thailand liquid ring vacuum pump supplier.
I.Installation of Pump Shaft and Bearing Parts
1. The pump shaft and bearing are loaded into the bracket from the non-driving end of the bracket. The pump shaft can be mounted into the bracket by tapping the outer ring of the bearing. Note: Pads or sleeve tools should be placed on the end face of the bearing to prevent damage to the bearing.
2. Install non-driving end bearing cover and locking bolt.
3. Install washer, drive end bearing cover and locking bolt. When the pump shaft is rotated by hand, the rotation of the pump shaft should be smooth. If the pump shaft rotates and tightens, the bolt should be loosened slightly and the pump shaft should be adjusted to a smoother state.
4. Install flat key, pump shaft part of coupling, press plate of coupling and locking bolt.
II. Installation of pump body and mechanical seal
The static ring part of mechanical seal is installed on the pump body. When the static ring part of mechanical seal is installed, it can be wetted by water and pressed into the pump body evenly by hand. Be careful not to be too fierce! After assembly, check whether the static ring part of mechanical seal is tightly connected with the pump body assembly.
The washer is installed on the back cover of the motor, and then the pump body, the front cover of the motor, the bearing, the motor rotor and the inner bearing cover are installed in the motor housing, and the bolts are locked.
The motor fan, clamp spring, motor shield and screw are installed in turn. After installation, the pump at the fan cover end of the motor will be vertical to the ground, ready to install other parts of the pump.
III. Impeller Installation
1. When the impeller is pressed on the bearing, the clearance between the impeller and the front end of the pump body should be 0.05-0.15 mm. Place the vacuum pump horizontally and check the clearance. If the clearance is too small, it may cause mechanical failure of the vacuum pump; if the clearance is too large, it will lead to a decrease in the pumping speed of the vacuum pump.
2. After adjusting the clearance between the impeller and the front end of the pump body, the depth difference between the outer edge of the pump and the impeller plane is measured by depth percentile, and the clearance reserve is determined.
IV. Installation of pump cover and disc
1. Place the motor shield downward and vertically on the ground.
2. Put the prepared disc into the pump body. Small holes 4.2mm in diameter near the disc and pump body should be accurately combined with positioning pins.
3. Apply sealant evenly and continuously to the top of the valve disc on the sealing surface on one side of the pump cover. After coating, install the pump cover on the pump body and valve disc and tighten the bolt. When installing the pump cover, it should be noted that both ends of the cavitation protection pipe must be installed in the corresponding holes of the valve disc and the pump cover respectively.
V. Installation of Pump Cover and Disk as a Whole
1. Put the motor’s foot up and the axis on the ground in a horizontal direction to maintain the level.
2. The pump cover and the pump disc form a whole. Push the pump cover onto the pump body. Attention should be paid to aligning the positioning pin with the positioning pin hole of the pump body and disk. Tighten the pump cover to the pump body with bolts.
3. After installing the pump, turn the motor fan by hand. The pump must rotate smoothly. If the pump rotates unsteadily or has frictional sound in the process of rotation, the pump cover should be removed, the clearance of impeller should be checked and adjusted again.
Above is the installation method of water ring vacuum pump parts from Thailand liquid ring vacuum pump supplier. If you want to know more, please consult us.contact@evpvacuum.com